Copyright © 2024 Polycopy. Website Design by axisfirst. Powered by axis vMerchant.
- Introducing the all-new Inkjet Printer!
- How to get the most out of your Task Chair
- What's Happening in the Paper Market in Q3 2022? 8 key reasons below...
- Is Paper the Main Cause of Deforestation?
- How Does Paper Benefit Our Society & The Environment?
- What's Happening in the Paper Market in 2022? 7 key factors below....
- Screens or Paper: Which is better for learning from?
- Super-Deduction Tax Relief on Office Furniture: How and Why?
- Video: Merchant Laminator
- Video: Stick with Exilon Glue
- Video: EnduroCopy Tuff (no need to laminate!)
- Video: Metallico Shimmering Paper
- 'Tis the season to be...
- Happy Christmas, and thanks...
- Who's left inside?
- Artwork tips for tip-top print
- Start planning for 2020!
- We're hiring!
- Not all shredders are equal...
- Be whiteboard wise...
Polycopy Blog
'Tis the season to be...
Posted: 12 Nov 2020
...kaskading!
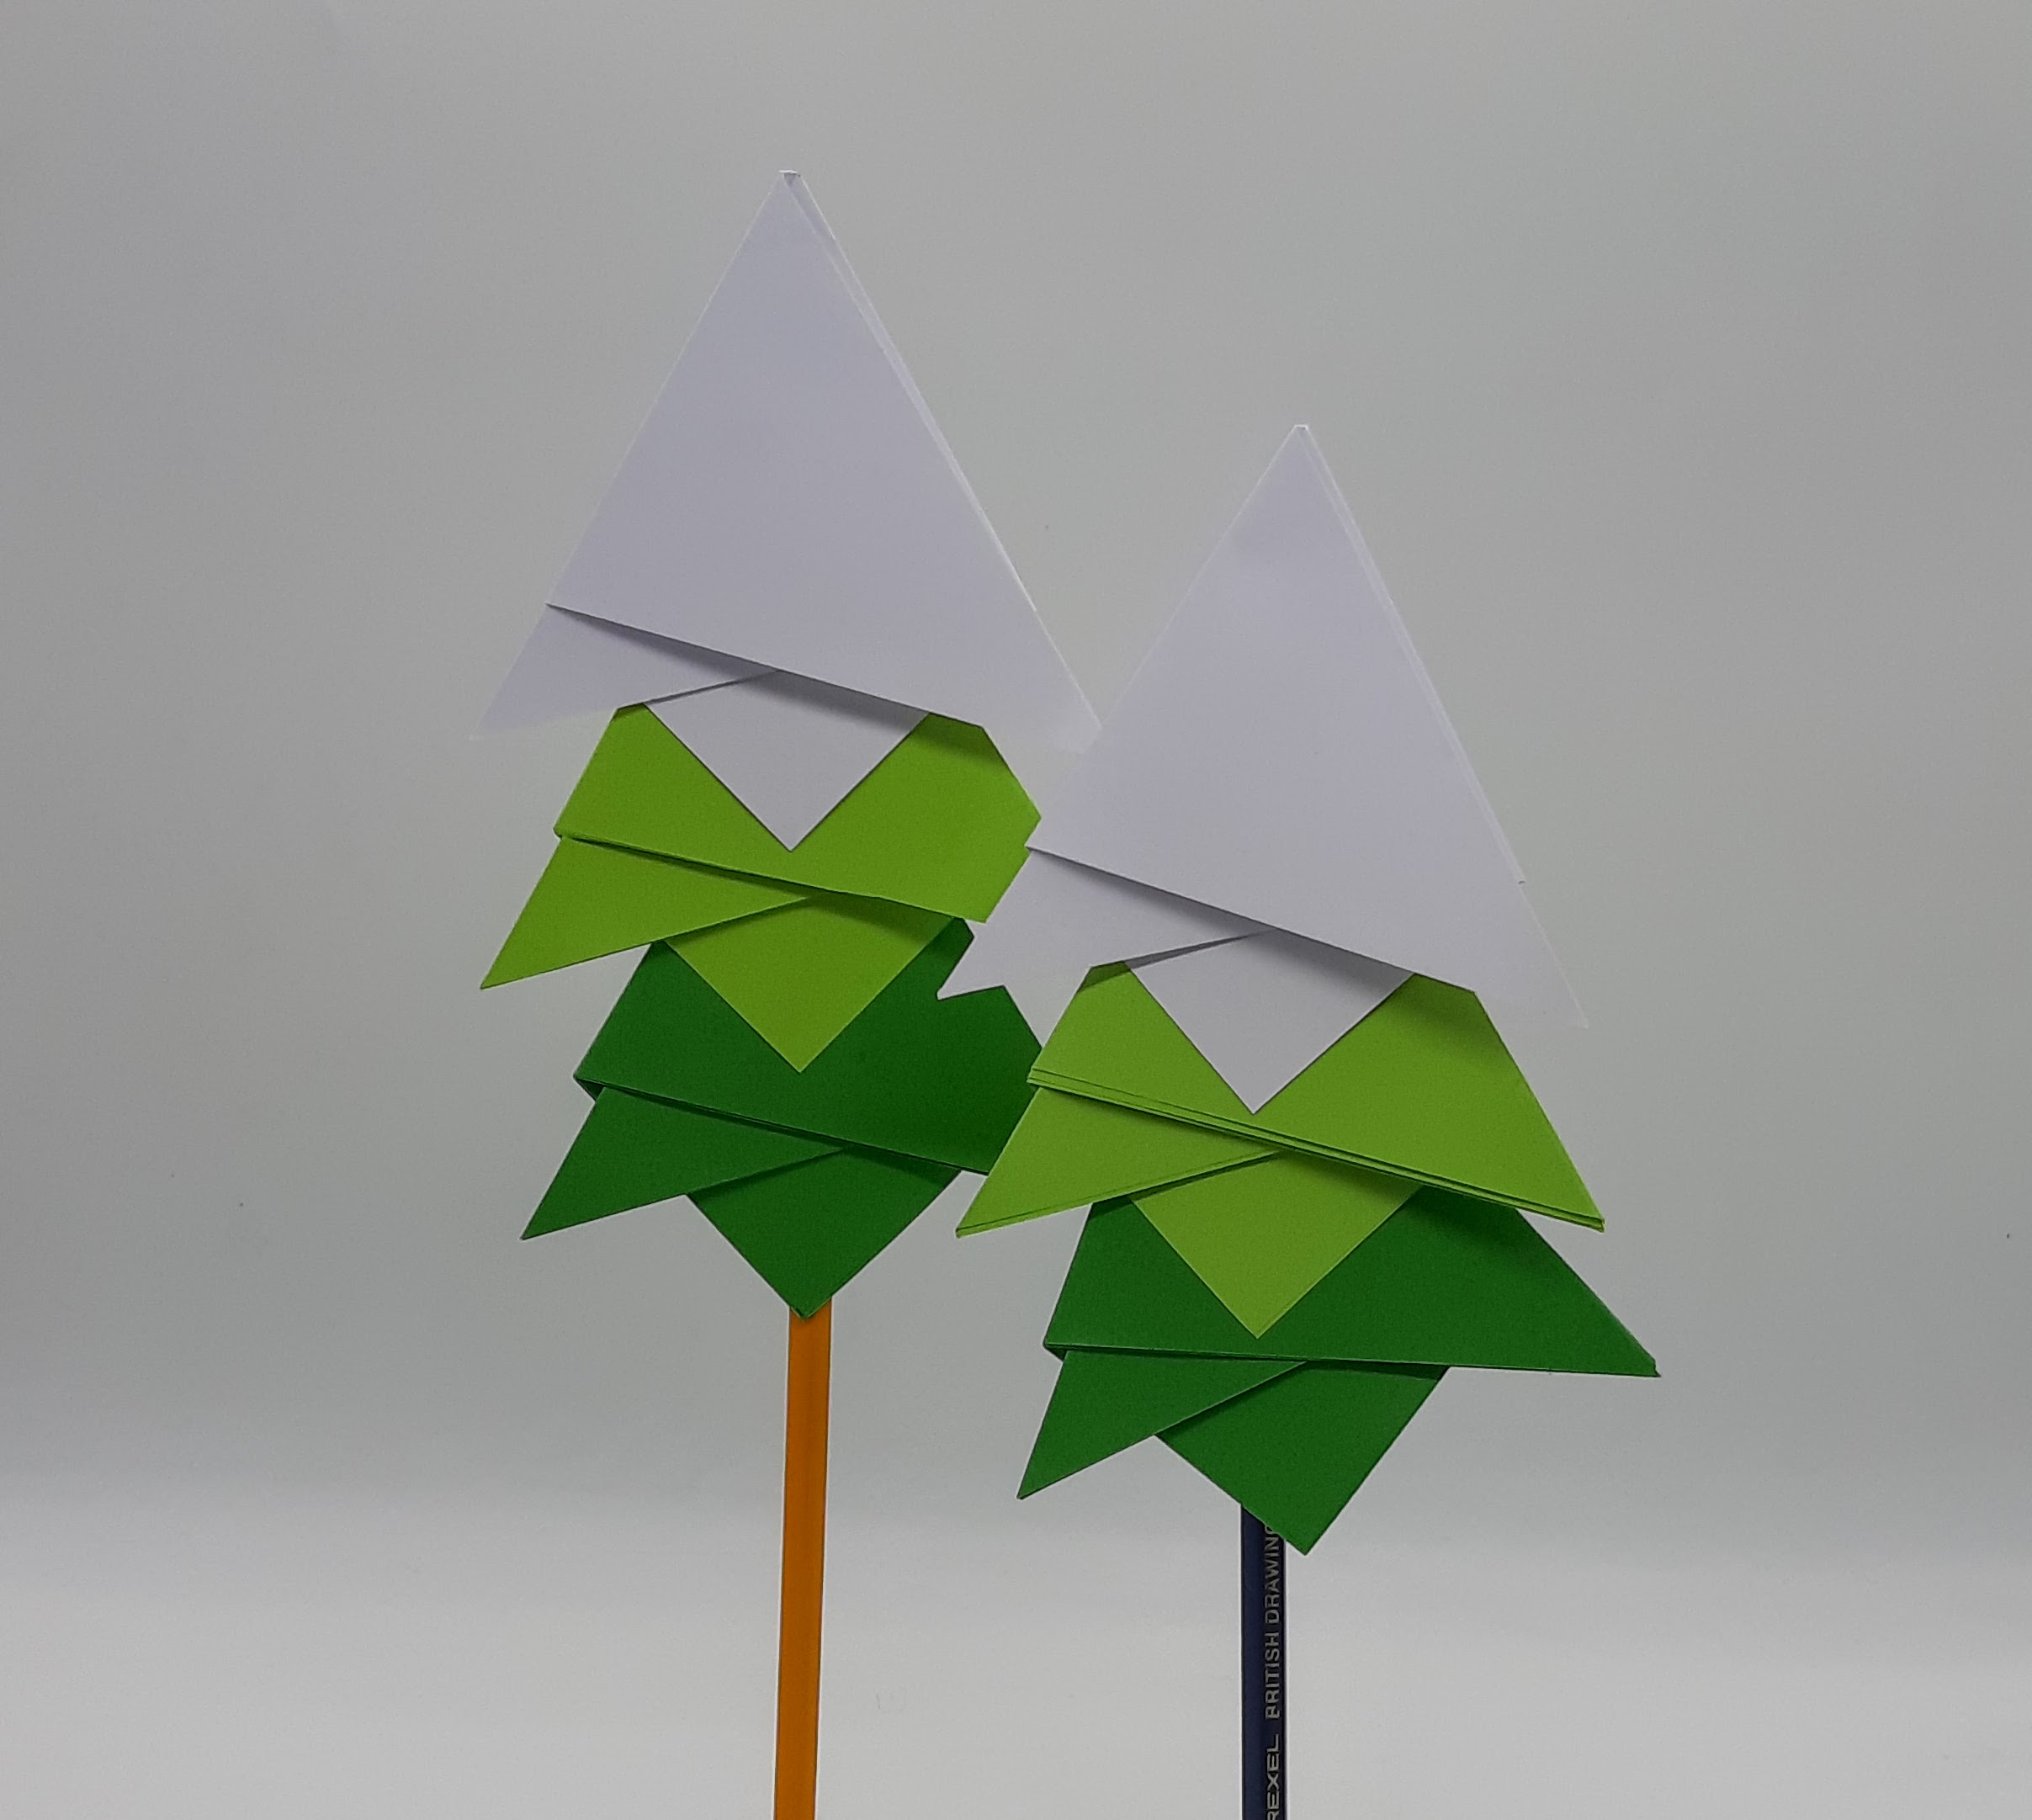
If there was ever a year that needed Christmas decorations, it's probably this one!
So we've put together a free origami tutorial below, showing how to make a Christmas tree, using the Kaskad range of paper!
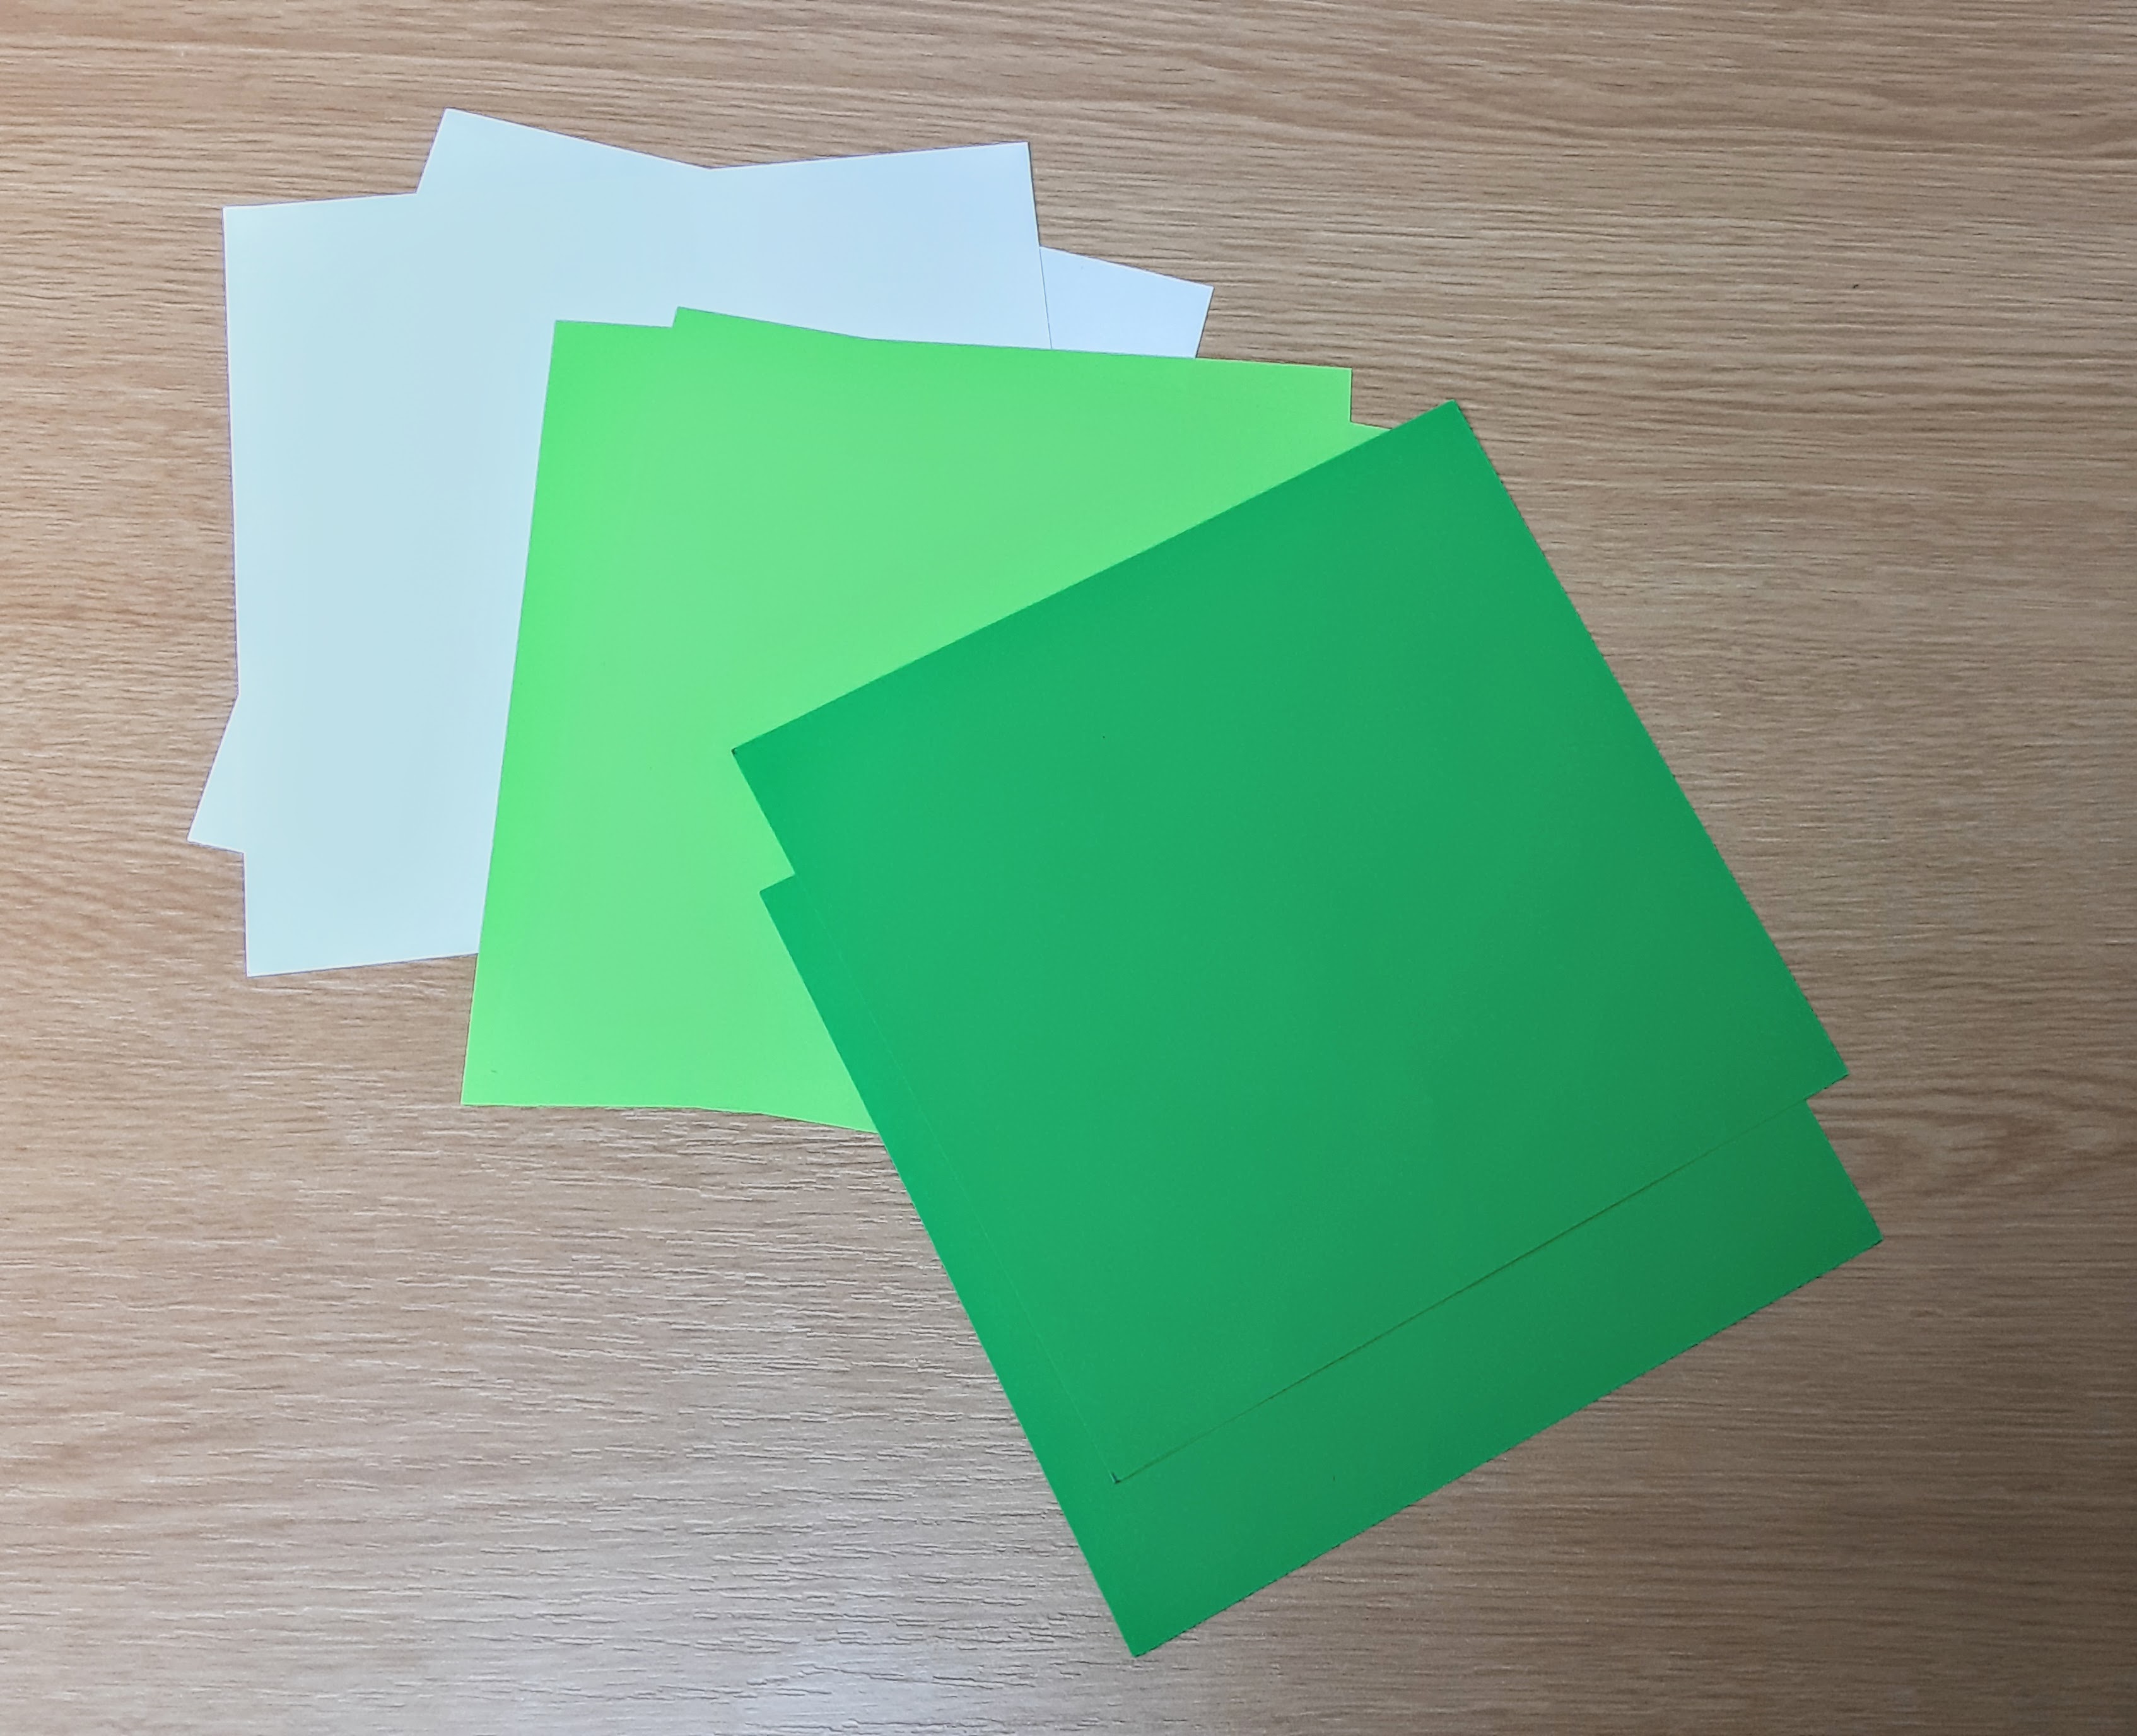
To make this tree, you will need:
- 1x square sheet of white paper (we recommend 120gsm Pro Design)
- 1x square sheet of Parakeet Green Kaskad
- 1x square sheet of Mallard Green Kaskad
- A lollipop stick, strong art straw or pencil!
- Exilon Glue Stick
- PVA glue/Blu-tack
For this tree, we used 15x15cm square 120gsm paper.
To make a bigger tree, just use a bigger piece of paper!
1. Fold the square of paper in half diagonally.
2. Make a crease vertically down the sheet from the top point, as shown below.
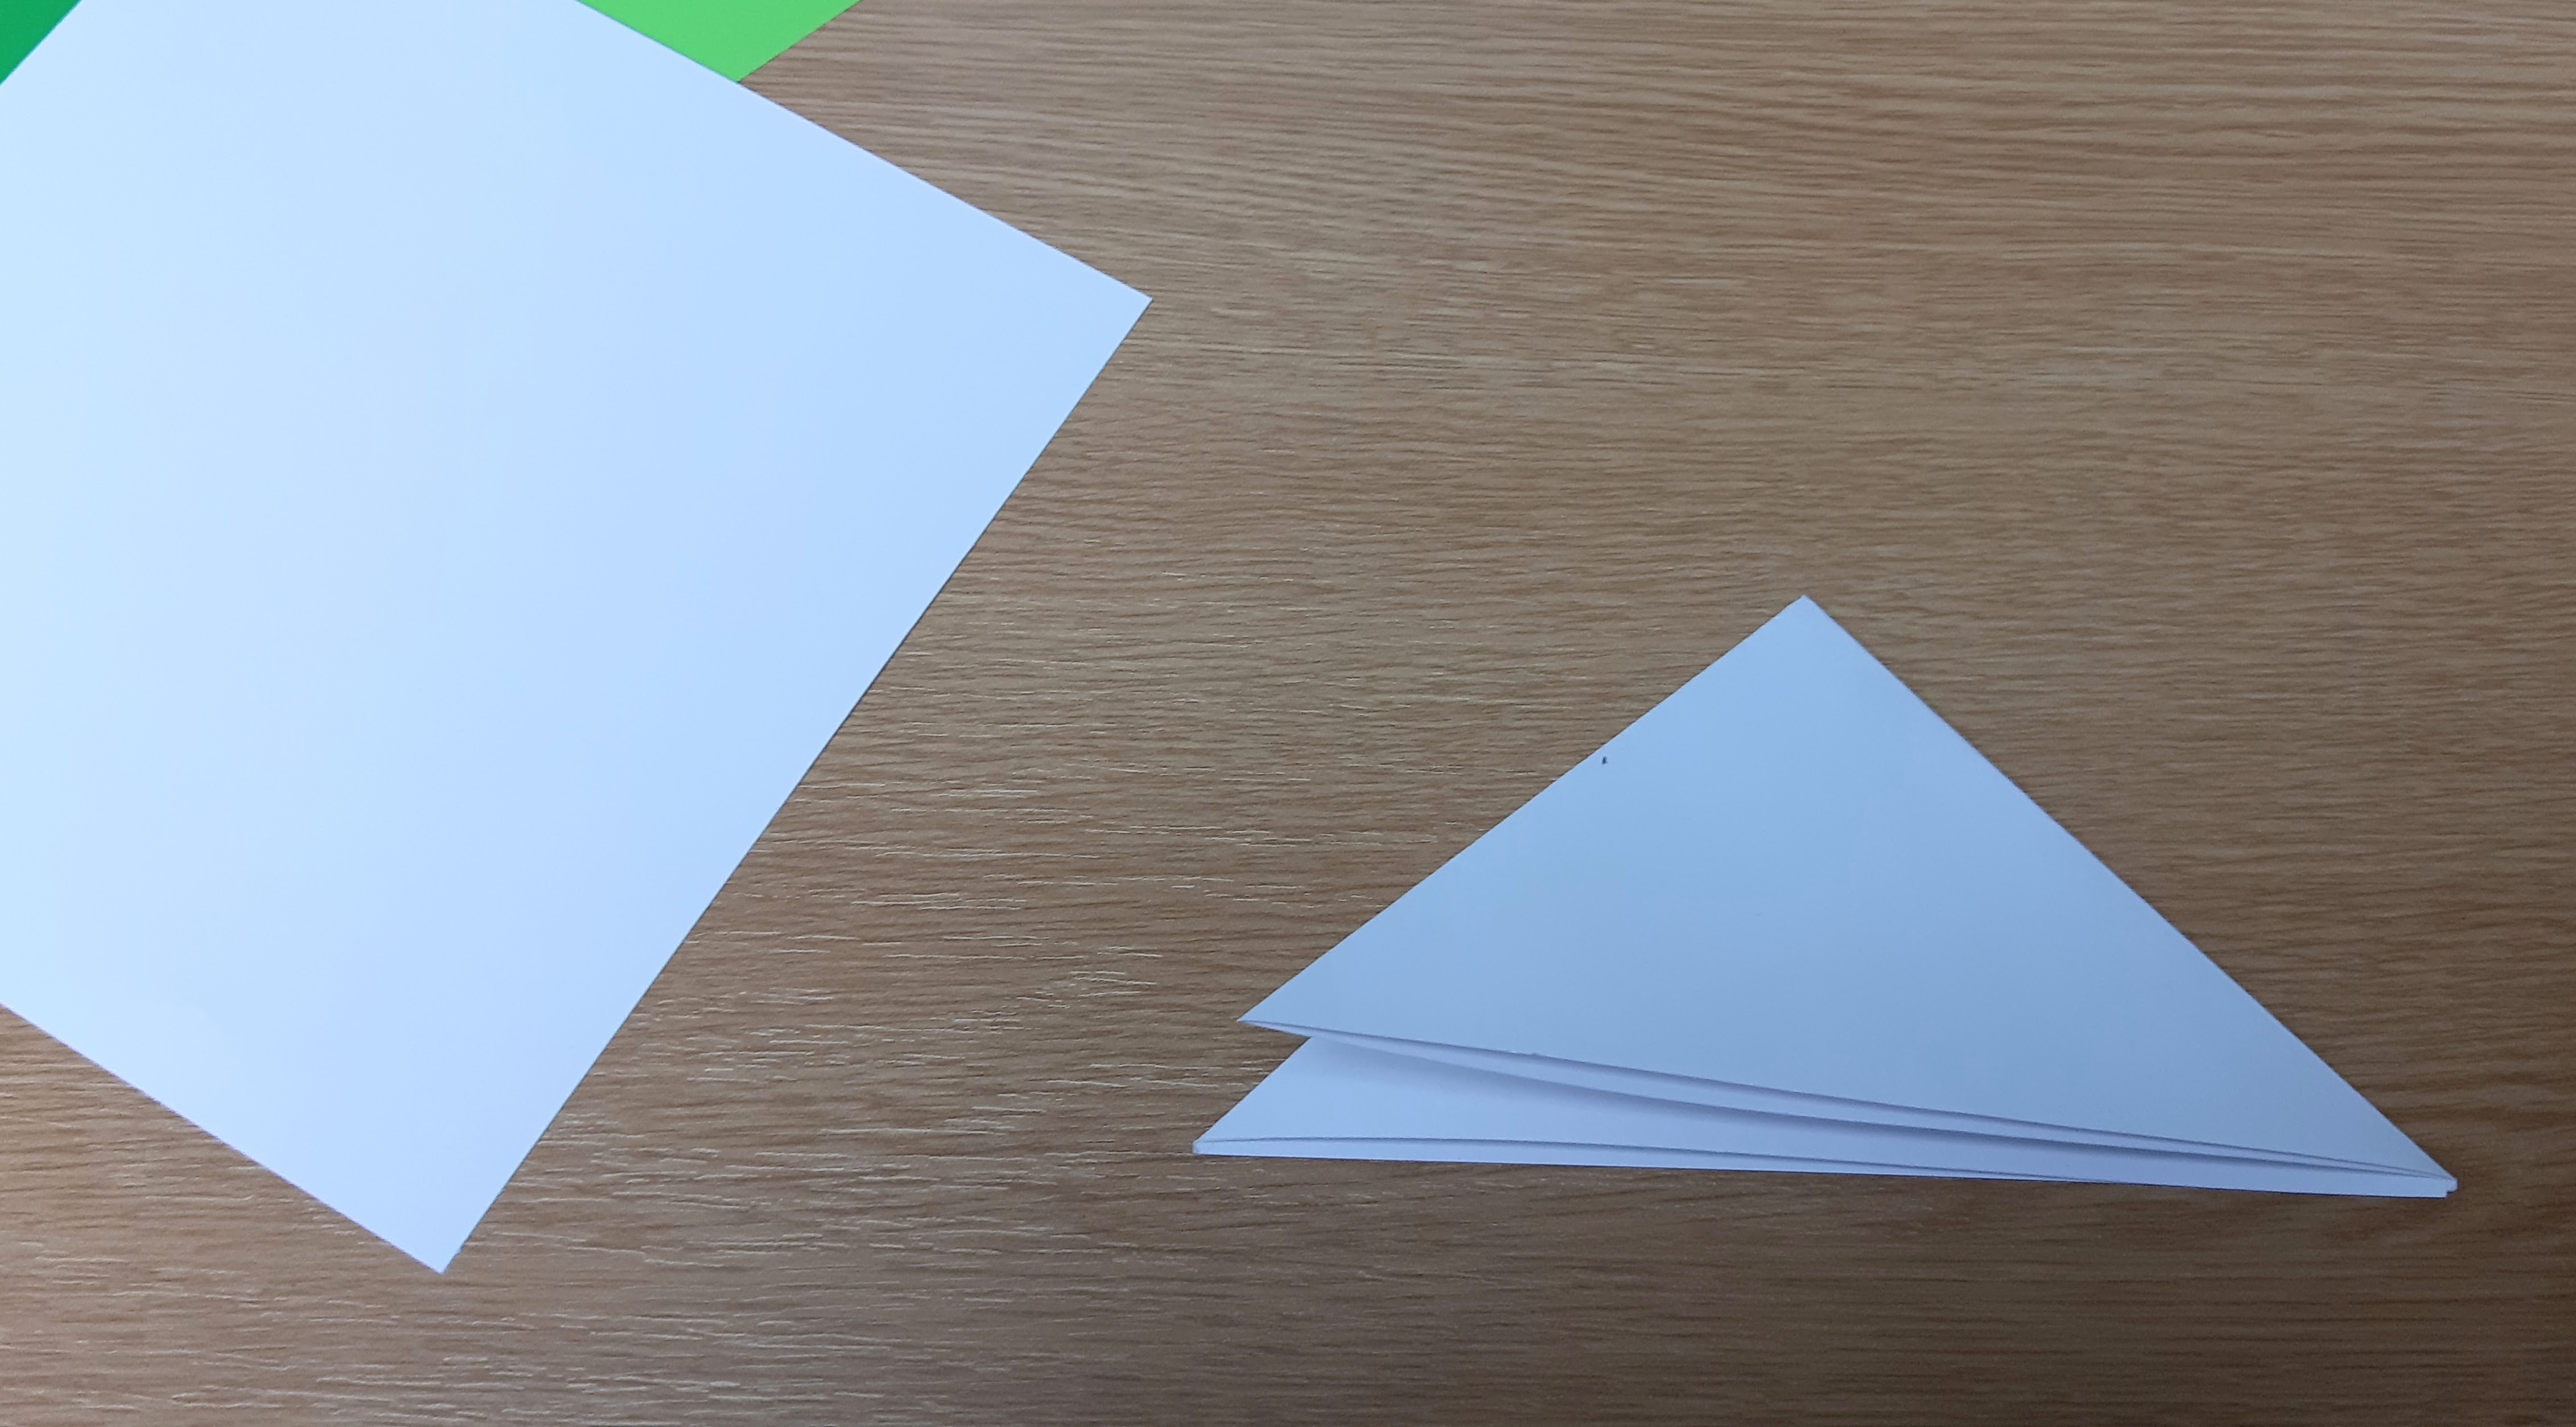
3. Unfold the last fold you made and flatten the sheet out.

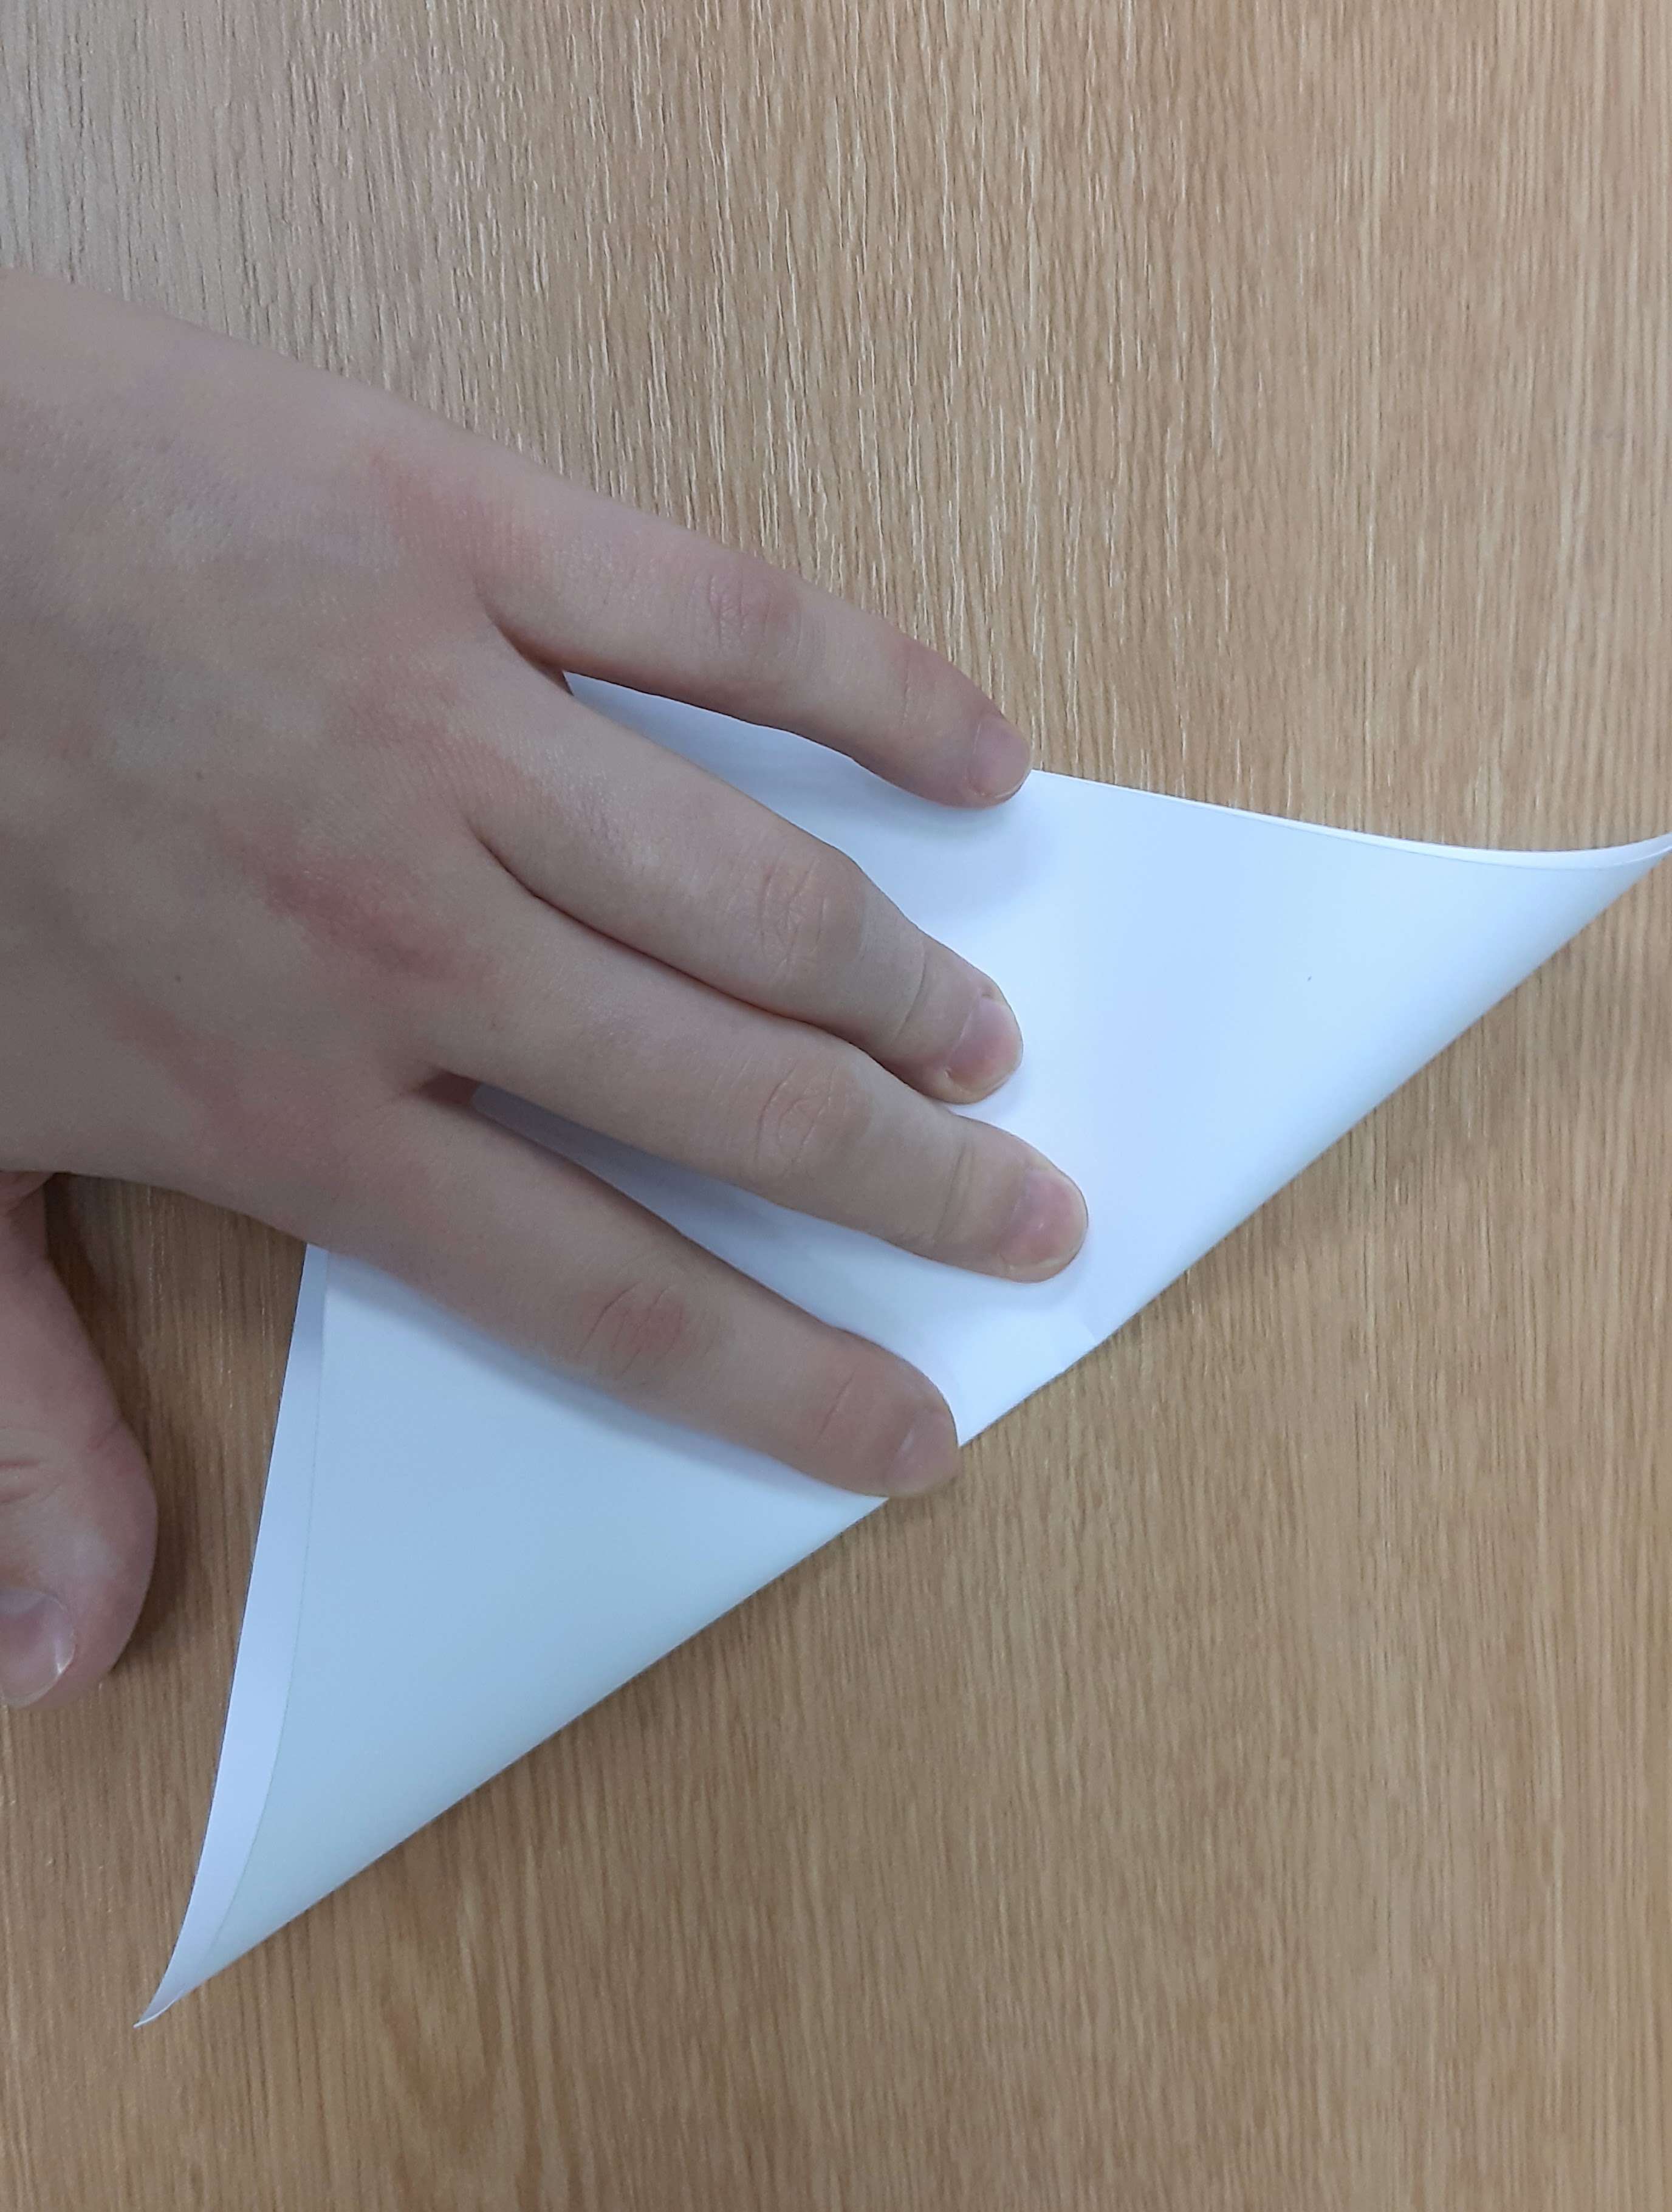
4. Take the right hand point of the triangle and fold it horizontally across to the left.

5. Take the left hand point of the triangle and fold that horizontally across to the right.

6. Repeat steps 1 to 5 for each of the other colours, until you have three "folded triangles", one in each colour.
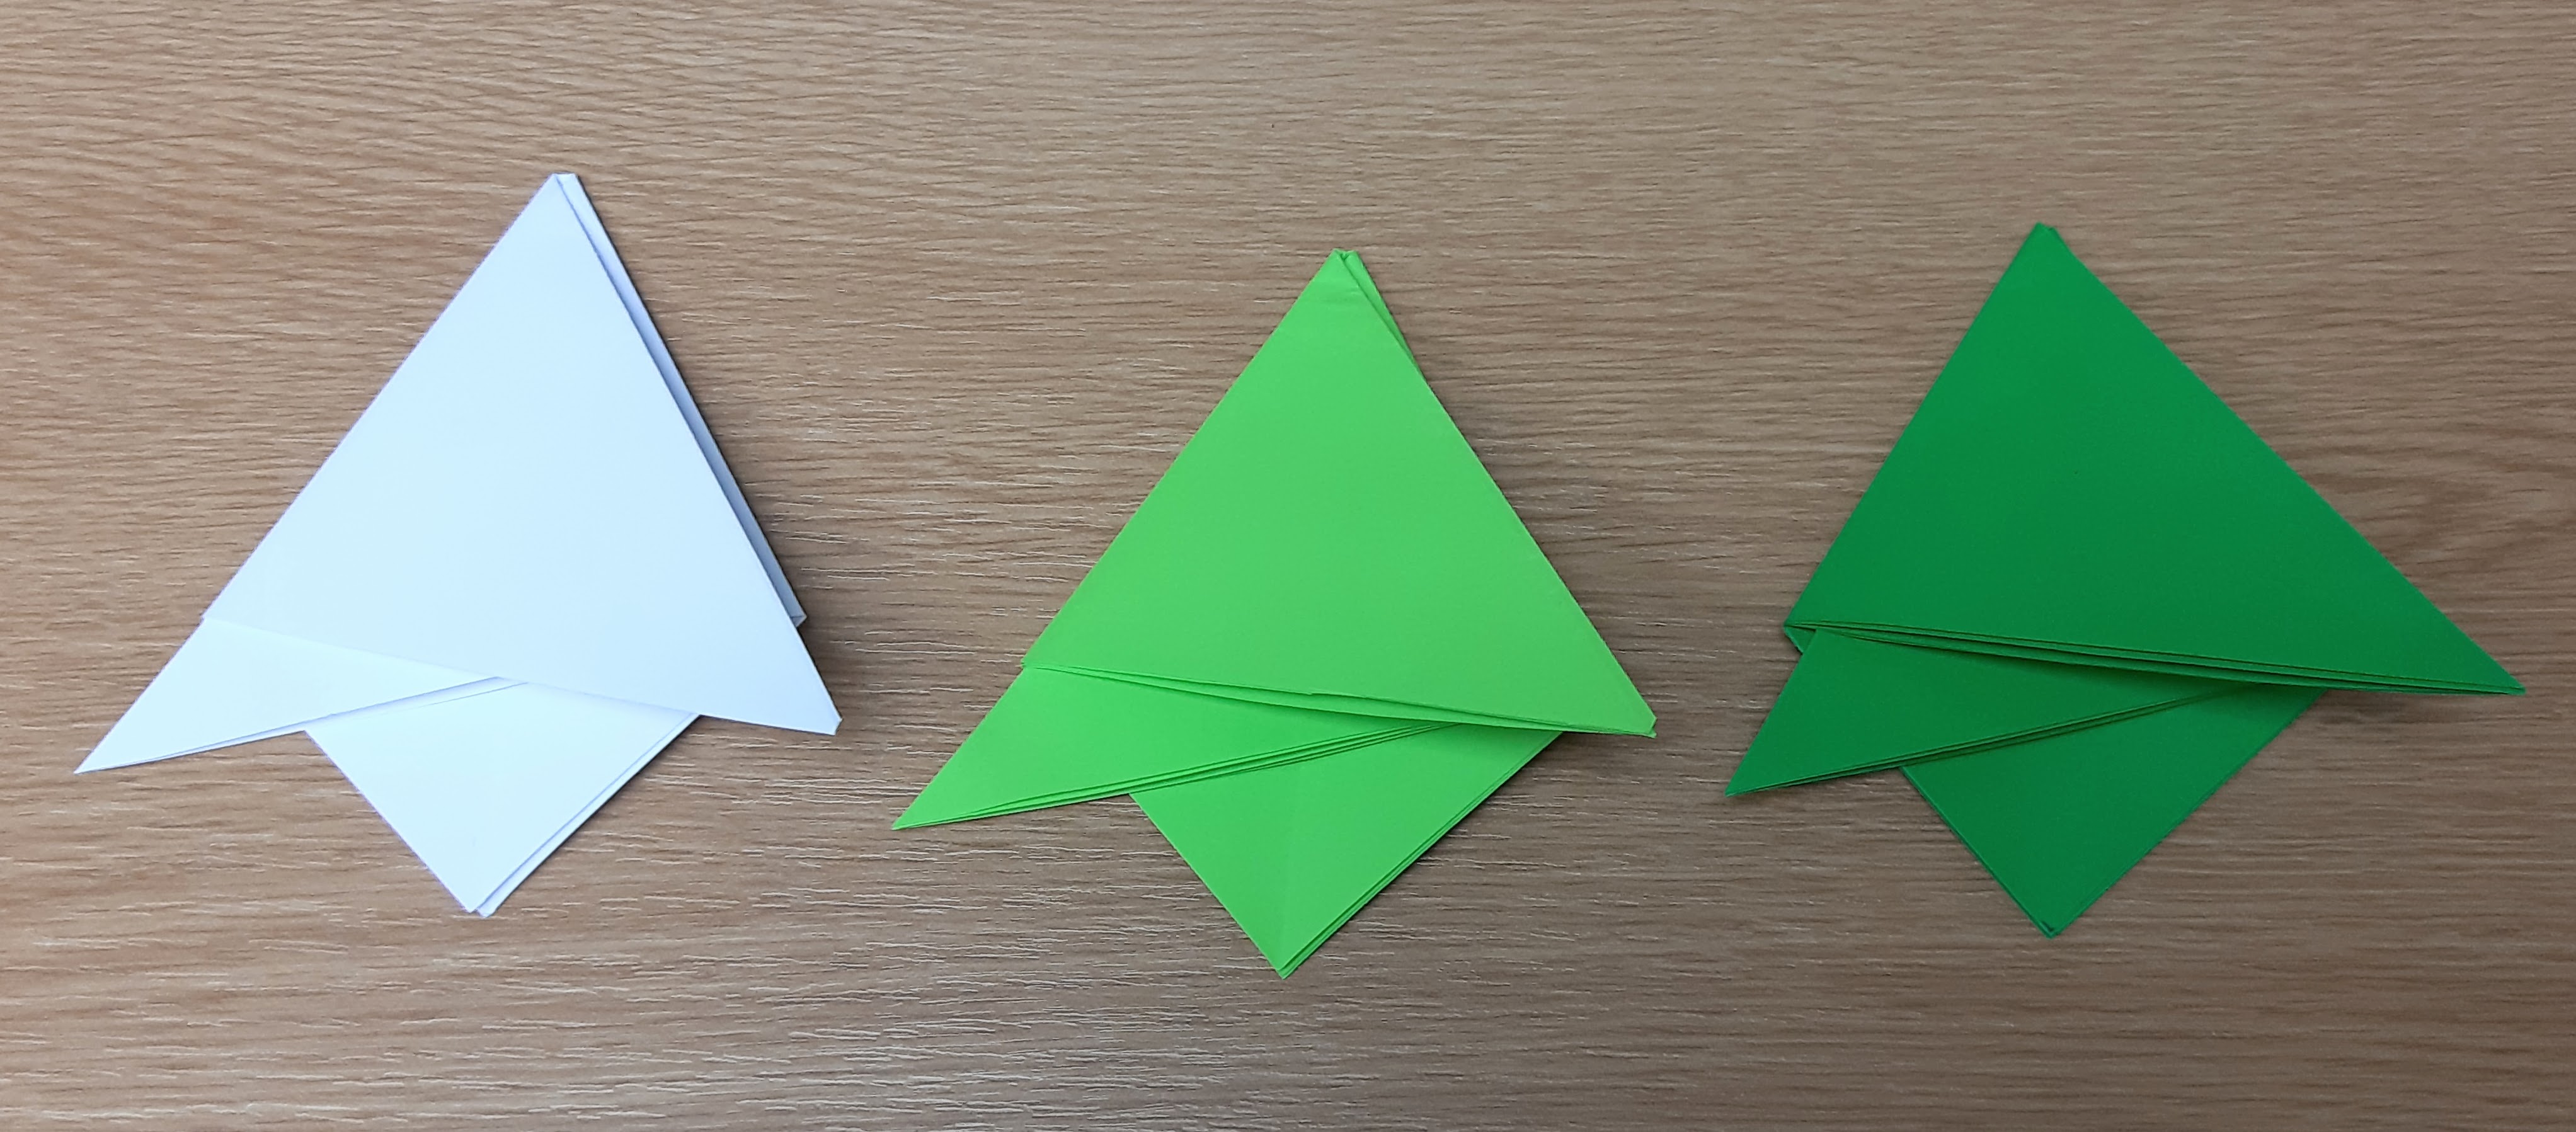
7. Stack the "triangles" on top of each other, poking the point of the lower one in between the folds on the upper one, as below.
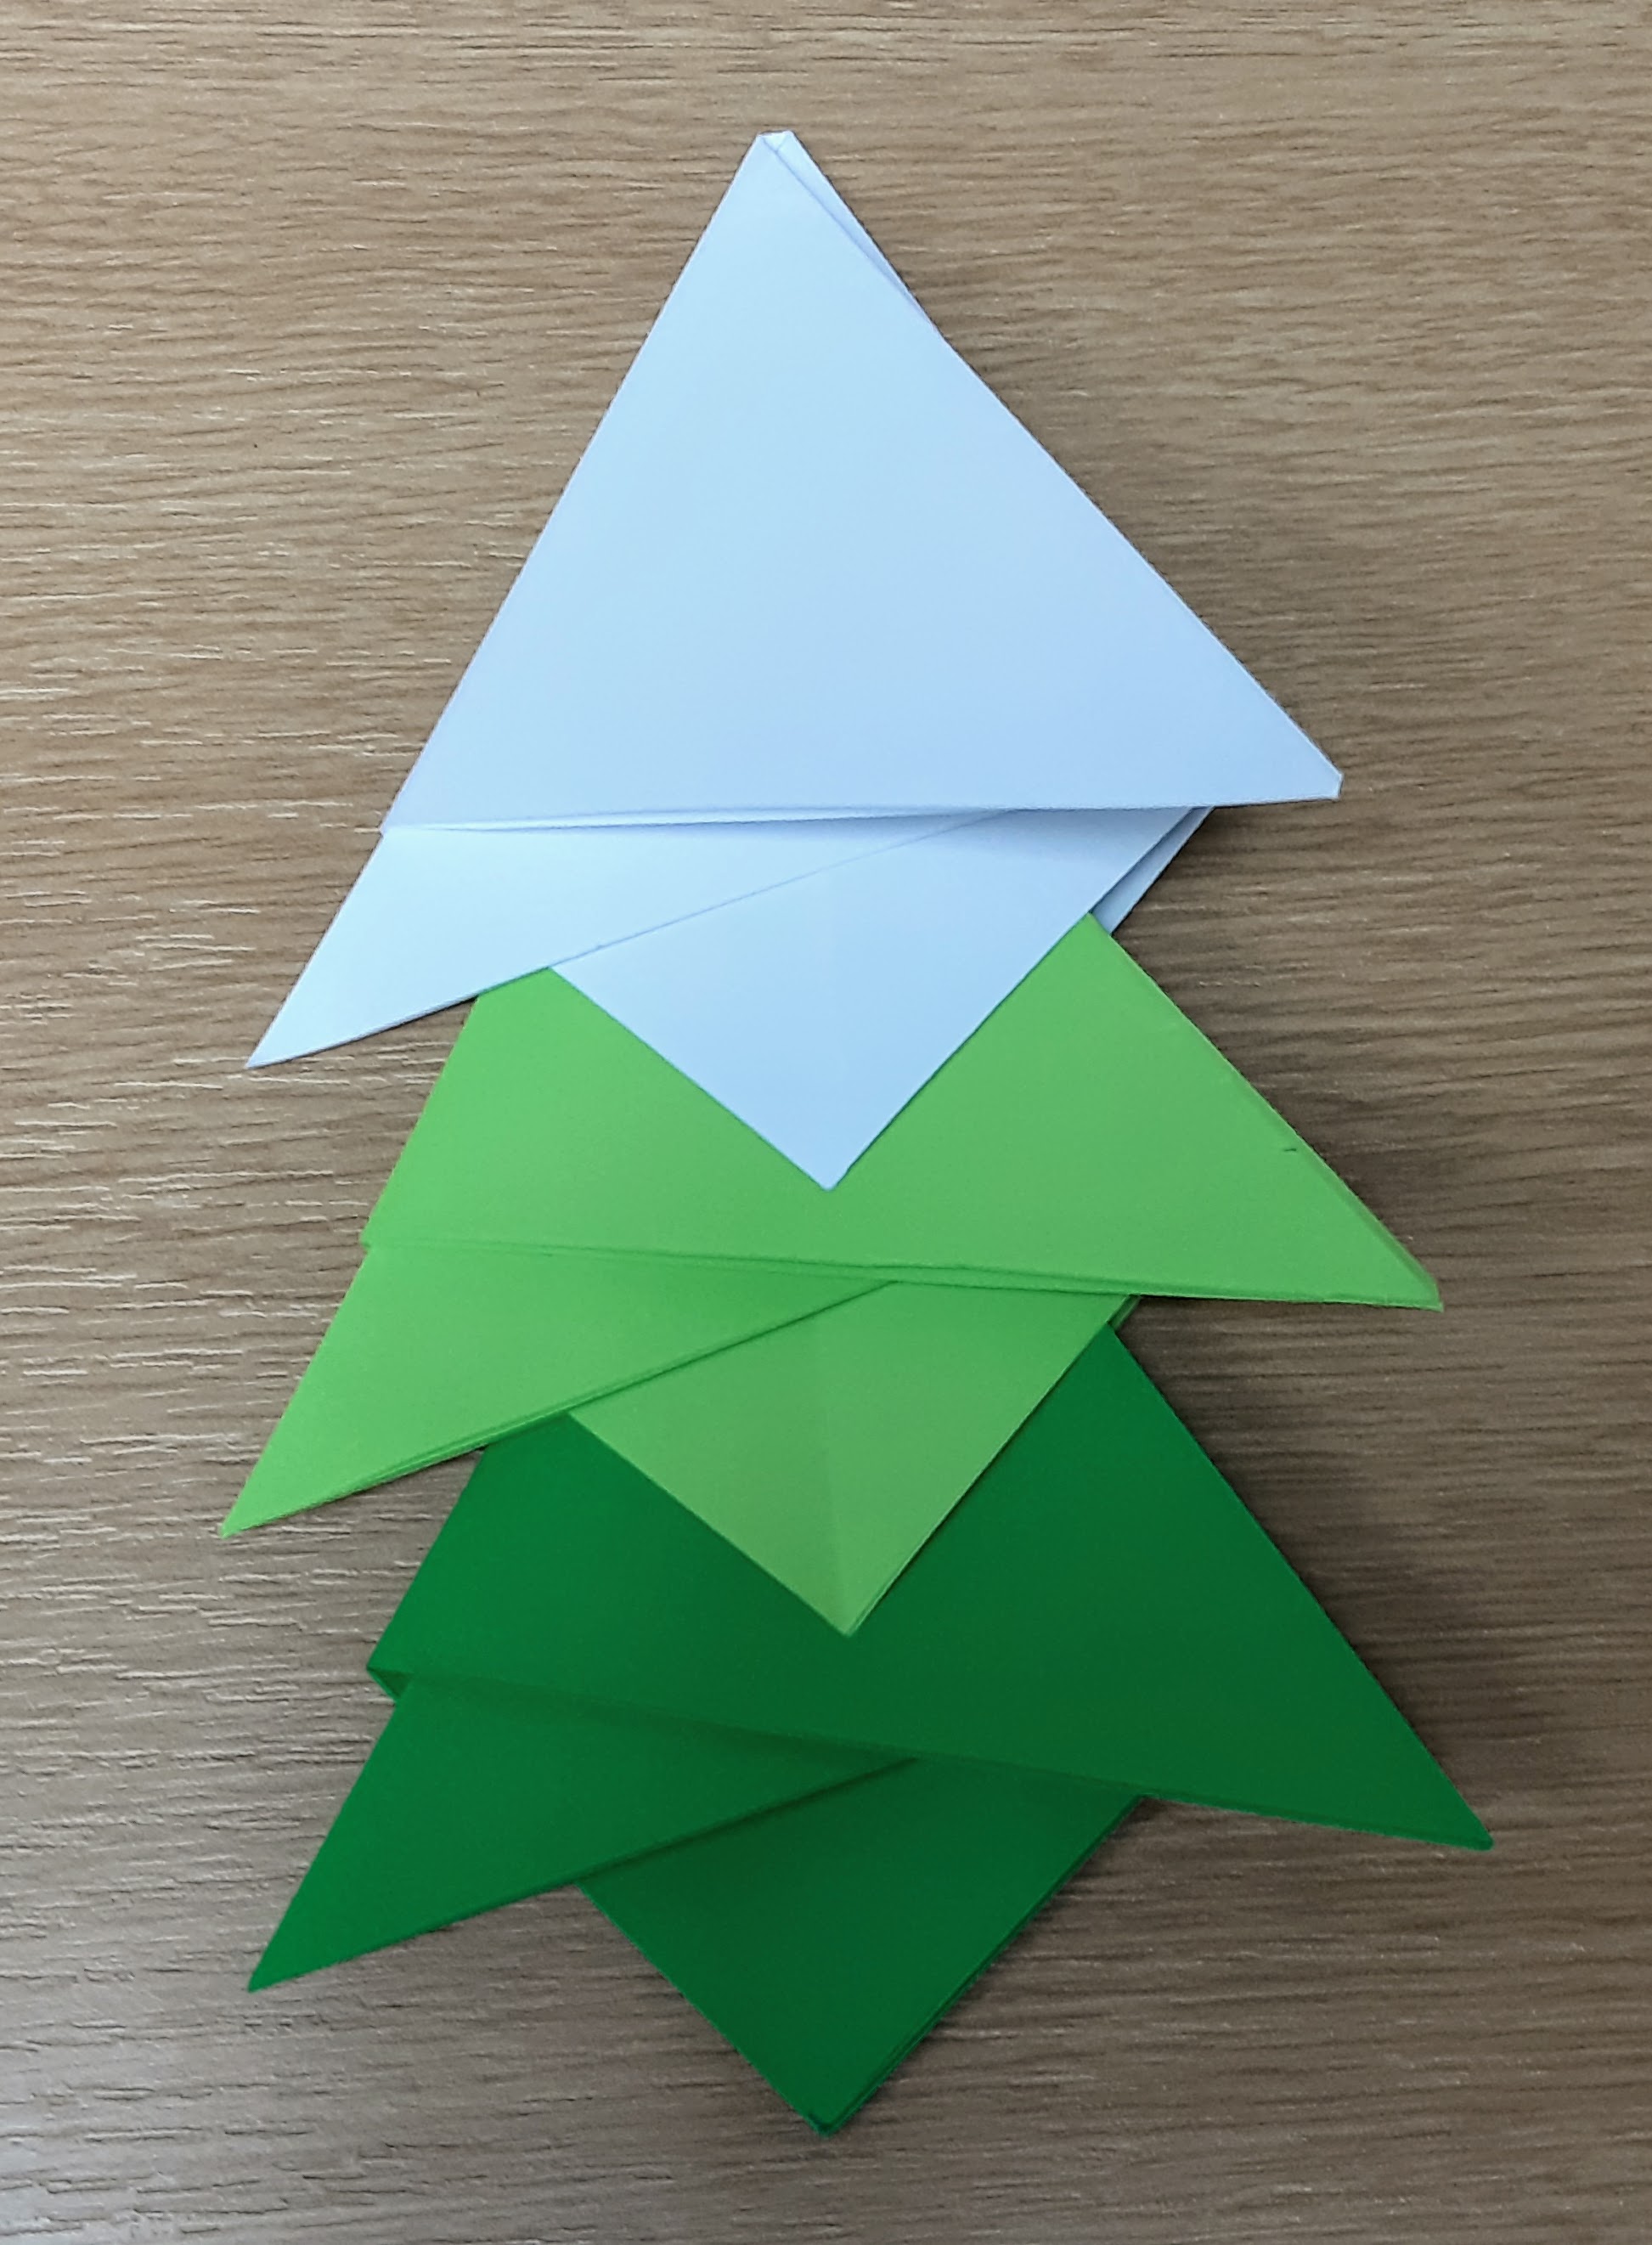
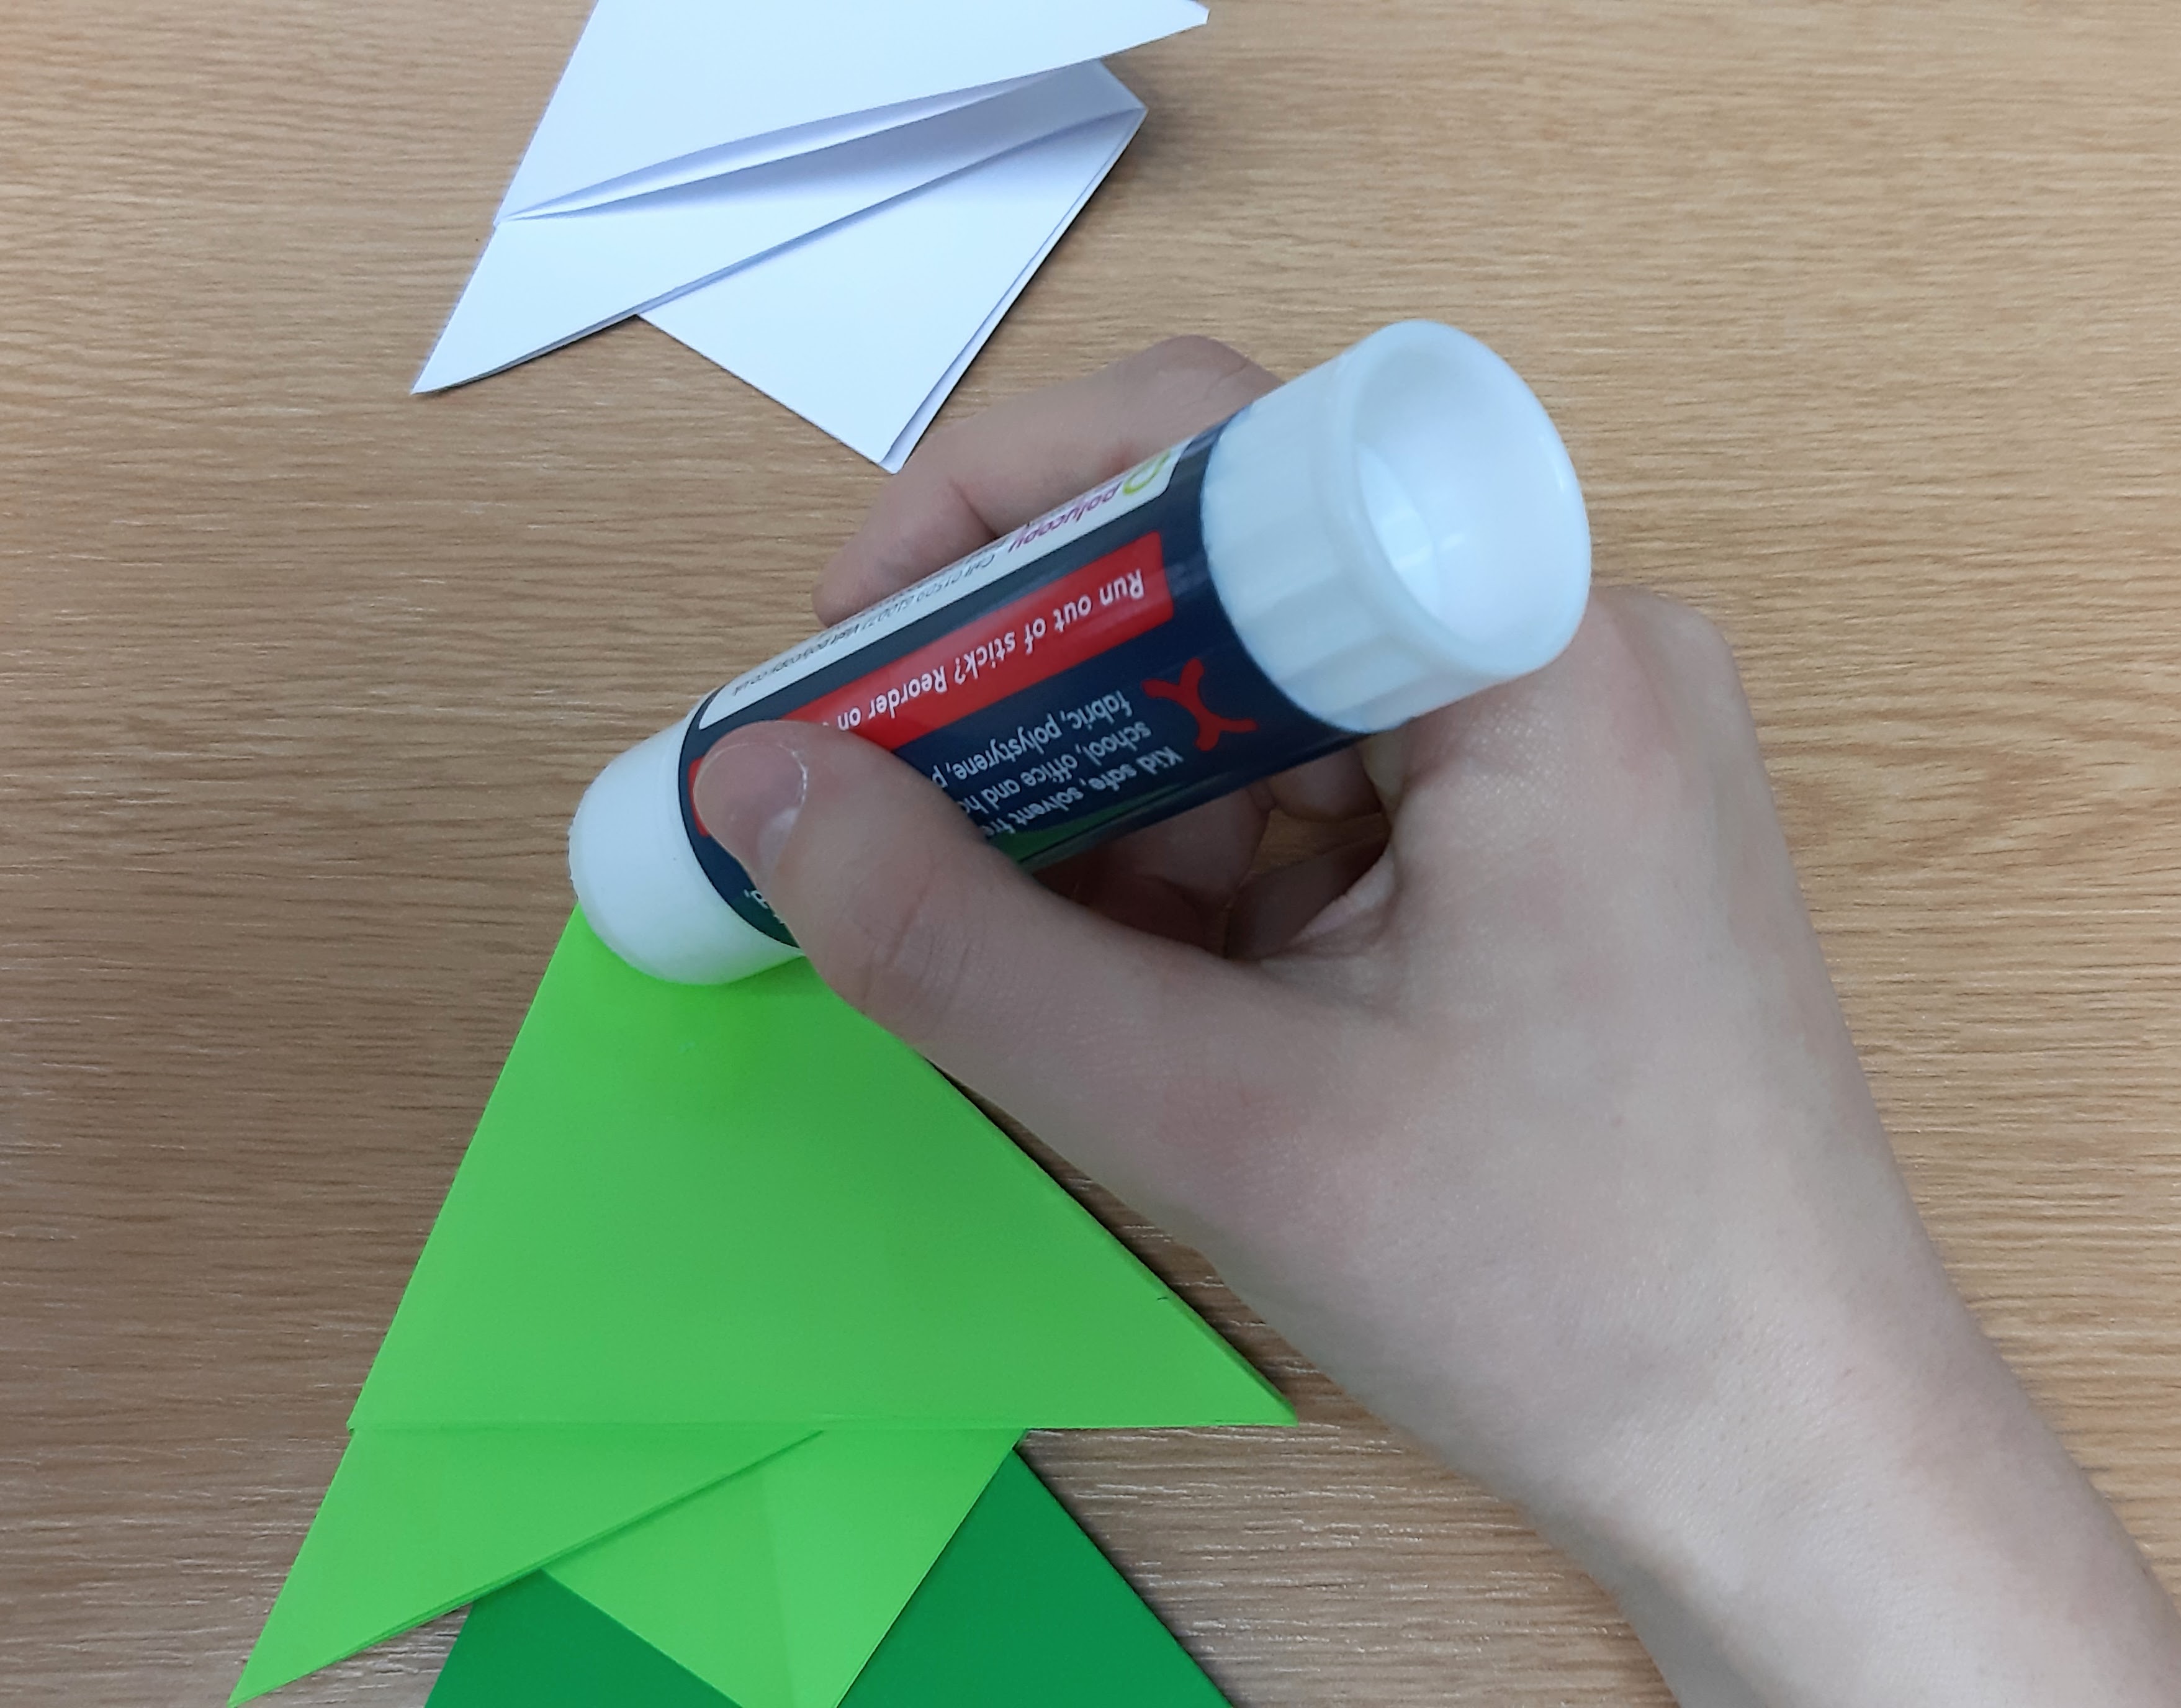
8. You may need to glue the top point of each triangle to secure it the triangle above, as shown below.
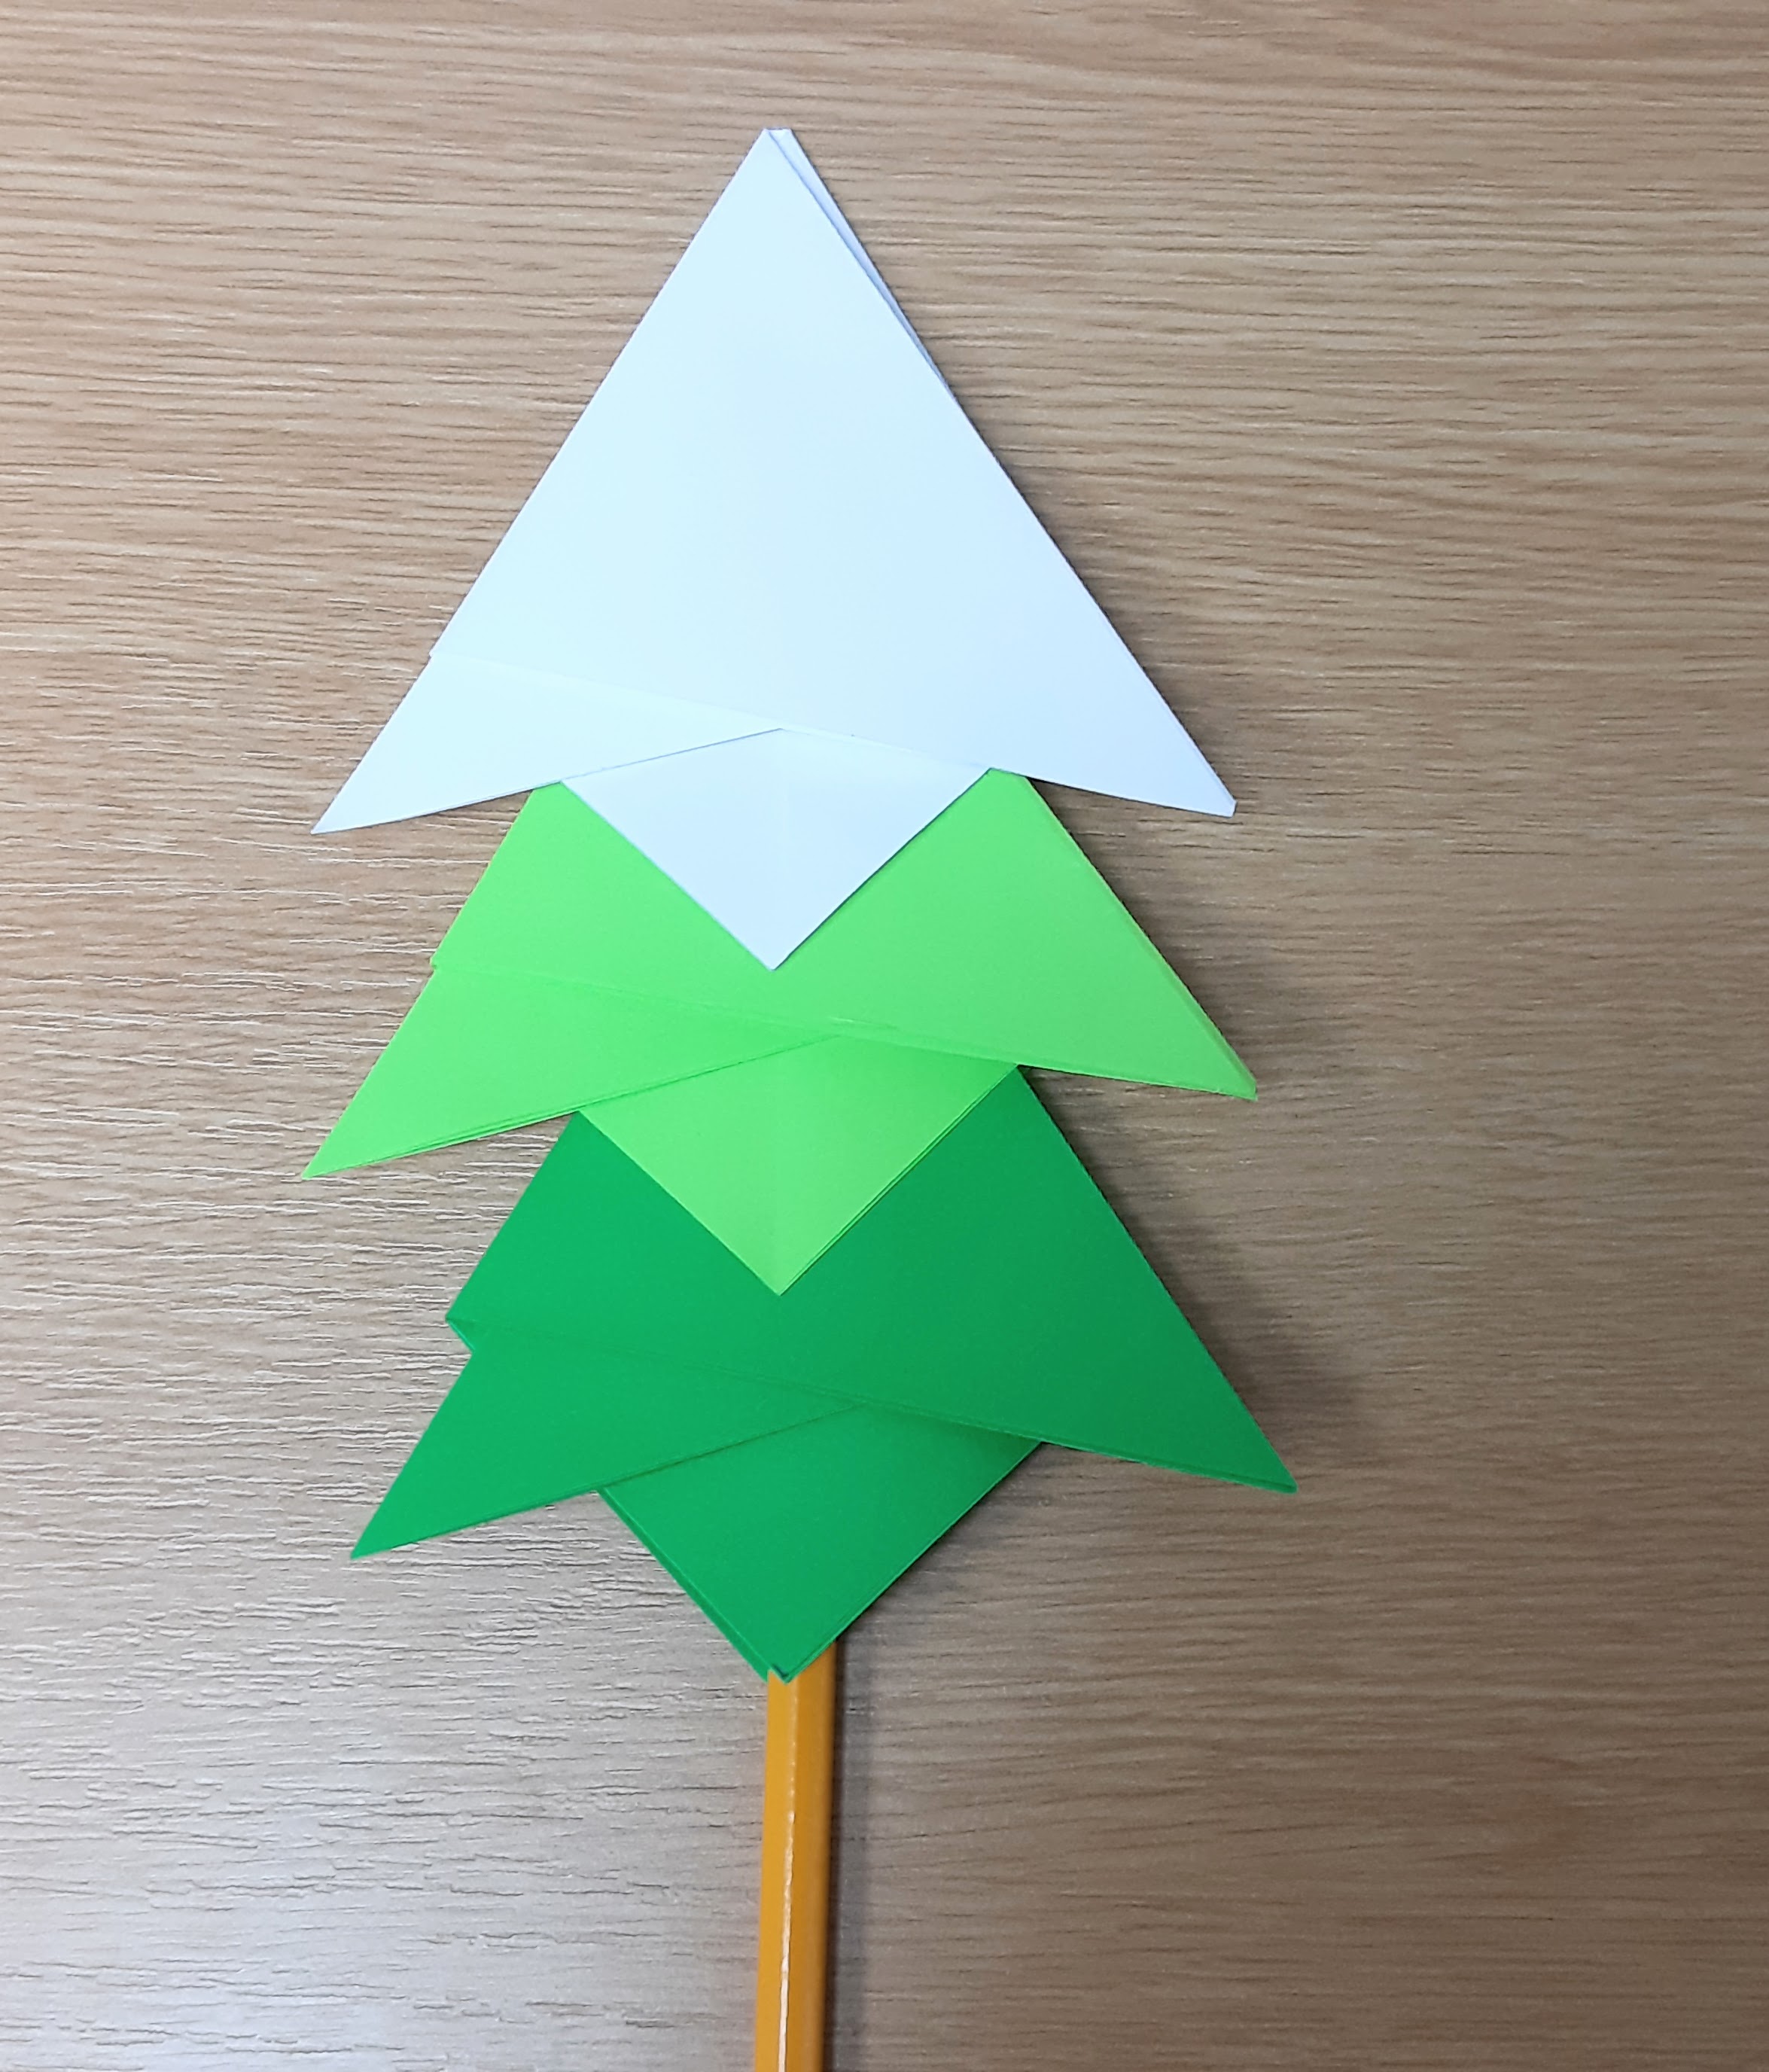
9. Finally, stick your lolly-pop stick inside the bottom triangle, using PVA glue or Blu-tack.
To get a different look, try using different sizes of paper for each colour. For example:
- 7x7cm white
- 11x11cm leafbird green
- 15x15cm mallard green.
 Please look out for our FSC® certified products